Yesterday got away from me!! So sorry for the no post. Okay I have a simple
DIY on how to do the ribbons as seen here for
Lauren's Butterfly Party. It is actually really easy and I bet some of you may have a more simple way to do this.
As you read from my post on
Tuesday, the yellow and white stripe fabric is from
Ikea. Okay let me take a moment to tell you that this is one of the best places to shop for fabrics!! They are at a fantastic price, modern, simple ( you do not want to use busy fabrics for your tables or your candies will never show up),
AND they discontinue things monthly and have a bin they throw them in and are marked WAY low. So with that said- everyone is going to go to
Ikea and buy fabric.
I swear this is a
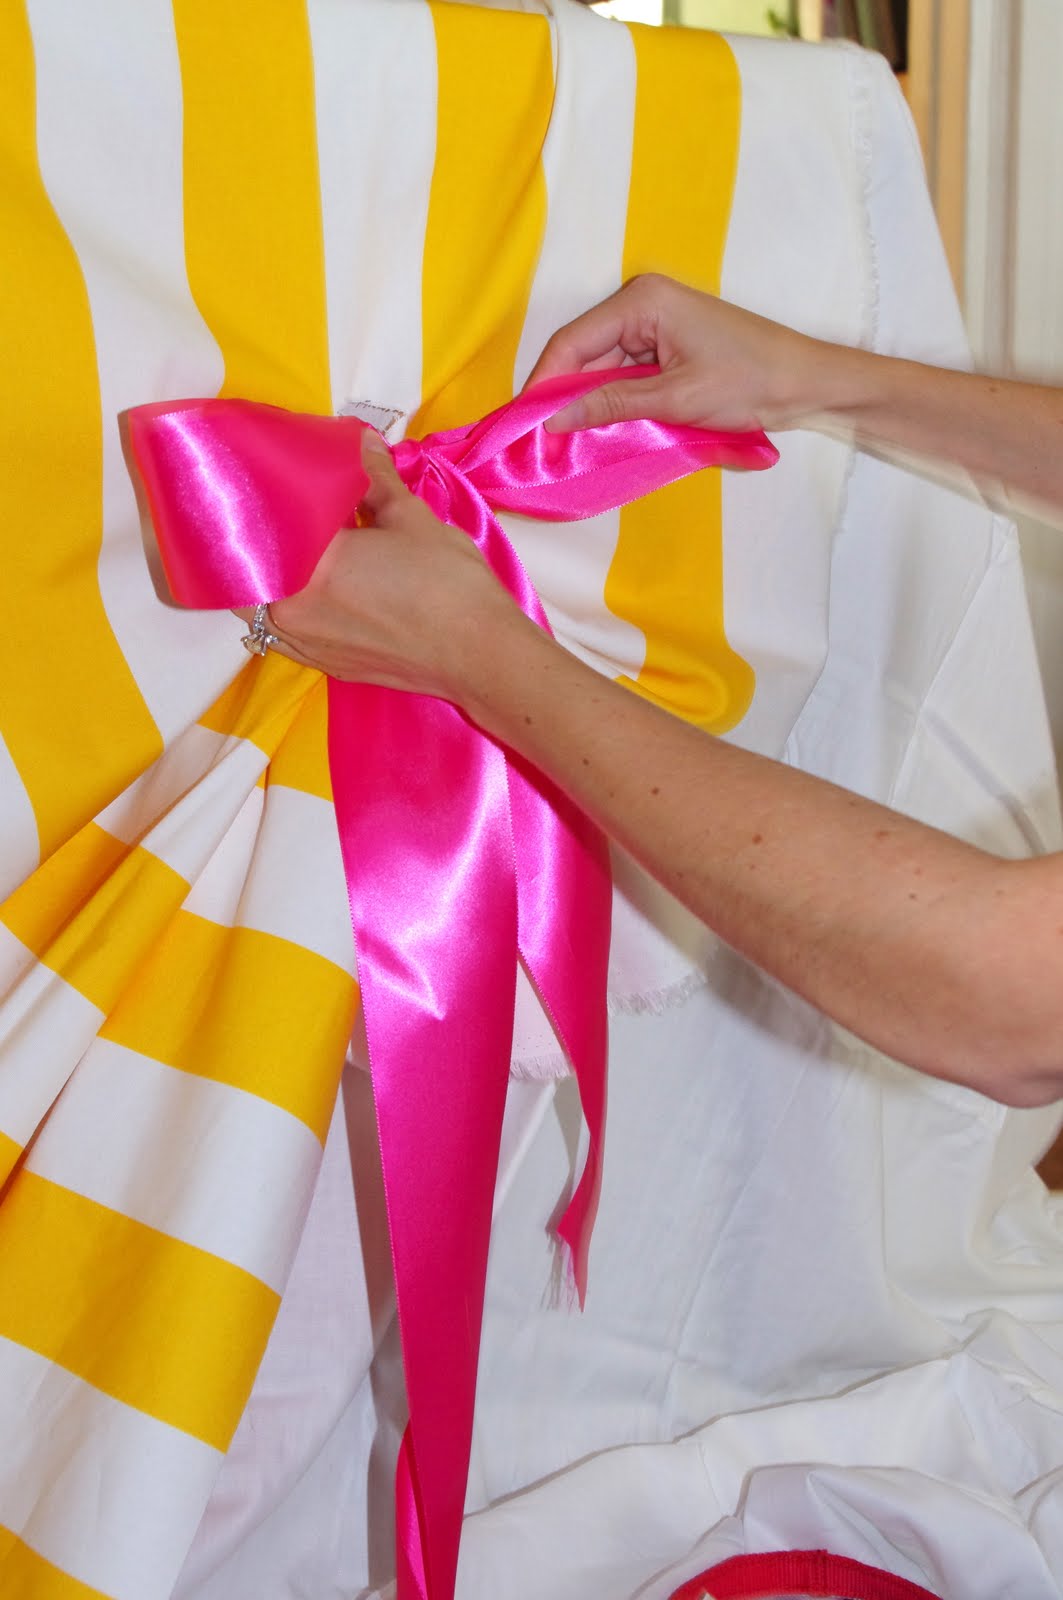
DIY tutorial!! Okay so buy the fabric and cut it extra long in front. I cut mine so it was an extra 18" after it touched the floor.
Come in from each side about 16-22" (depends on how big you want your swag) and measure from the bottom and mark every 12". Make 5 marks at 12" intervals. Then make a slit with the scissors horizontally.
Take your ribbon and thread it through- inside then outside. Until it is weaved through.
Gather the 2 ends together and tighten. Tie those 2 ends into a bow. You may need to secure the bow a little more so it is "tighter". If this is the case, what I used is bobby pins on the underneath side and I just safety pinned the bow to the fabric which also made the bow look higher.
So like I said, their may be an easier way to do this but this is what Ashley and I figured out. Comes from designing roman shades for clients!! (the grommet effect). Hope everyone has a great weekend and I have the most adorable client parties to share next week as well as another
DIY from the
Butterfly Party!!
******************************************
Oh and before I forget: The Butterfly Collection will be in the
SHOP by the end of the weekend!!!!
*********************************************


great idea!
ReplyDeleteGorgeous, that pop of pink really makes a difference.
ReplyDeleteLOVE Ikea!
WOW! Who knew! Thx for sharing! =)
ReplyDeleteAwesome tutorial!
ReplyDeleteLove it thank u for sharing it with us!
ReplyDeleteI just found your blog!!! Wow it;s so cute!!!!!!!!!!! I just love this Pink & Yellow !!!
ReplyDelete